- Home
- Guitar & Bass
- Amplifiers
- Electric Guitar Amplifiers
- Guitar Amplifier Heads
- Tube Guitar Amplifier Heads
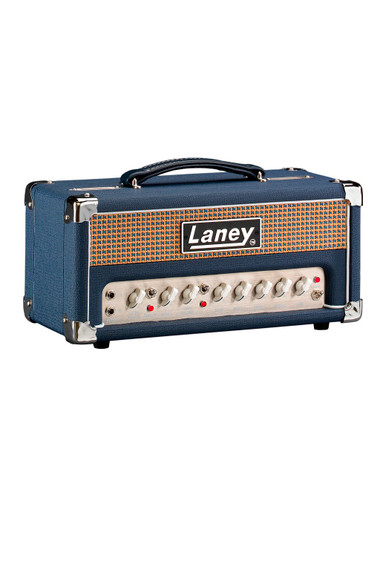
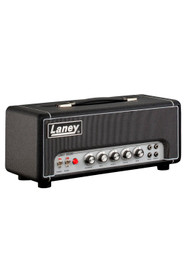
- Laney Lionheart L5-STUDIO 5w Guitar Tube Amplifier head with USB interface for recording and reamping direct to Computer or iOS
Categories
Current Top Sellers
Laney Lionheart L5-STUDIO 5w Guitar Tube Amplifier head with USB interface for recording and reamping direct to Computer or iOS
Product Description
BOUTIQUE CLASS A TONE IN A DIGITAL WORLD
Designed, engineered & made with pride in Great Britain, the L5-STUDIO is the first – and only – Single-Ended Class ‘A’ tube amplifier that has the ability to interface directly with any DAW, across any platform, using Laney’s unique T-USB technology. The L5-Studio is ideal for home and studio use, it can be run silently using the high-quality internal dummy load which means it can be used at any time day or night. The L5-Studio delivers an amazing array of clean, crisp, dynamic and open guitar tones. Whatever your style, play through a Lionheart and you’ll be amazed at how it reacts to your touch.
Designed, engineered and built with pride in Great Britain.
The Lionheart range brings boutique Single-Ended & Parallel Single-Ended Class ‘A’ tube tone to the discerning player who is looking for uniquely responsive BRITISH tube tone.
The L5-STUDIO’s 5W Class A Single Ended output stage oozes classic, warm tube tones. The harder you drive it, the better it sounds. Plus with enough gain for contemporary tones, it also has a mean, spiteful side to it as well – making it ideal for any style of playing. Perfect for studio and practice use (using the 5W or 0.5W output), but equally at home on stage plugged into a Laney LT112 or LT212 cabinet. The sound will blow you away. Utilising the T-USB technology first released in the IRT-Studio, the L5-STUDIO lets you combine the worlds of VALVE tone and digital flexibility in a way not previously available to players who were looking for vintage aesthetics, great valve tone all combined with modern features.
Every Lionheart product is extensively play tested by experienced guitarists before being shipped to our customers. Only when the unit is finished to our complete satisfaction is it assigned its own unique build number which is then hand stamped onto the rear mounted plaque.
Your L5-STUDIO should give you years of trouble-free amplification, however please take time to read this manual and familiarise yourself with the controls as it will allow you to get the best from your amplifier. We hope you enjoy using your L5-STUDIO as much as we enjoyed designing and making it.
DETAILS
Single-ended (SE) power output stages are probably the simplest form of power amplifier design and usually used for relatively small amplifiers, e.g., less than 15W. SE can only operate cleanly in Class A mode and produce an output rich in even harmonic distortion.
The T-USB interface supplies both a dry signal and the processed signal – split left and right to your DAW – directly into either your PC/MAC or iPad*.
In order to let you operate your tube amplifier silently we have included an internal dummy load. This means that you can use your amplifier without the need to connect an external load (speaker) to it, without fear of damaging your amplifier.
On-board studio quality reverb. Reverb gives you a sense of the space that you are in. A dry guitar signal can sound a little dull. Adding the right about of reverb provides the guitar signal with ambience and brings it to life.
KEY FEATURES
- PC & IOS platforms
- Hand selected tubes ECC83 & EL84 loaded
- Totally silent operation
- REAL TUBE tone directly into your DAW
- Lionheart embroidered slip cover included
- FS2-MINI supplied
- Switchable FX loop
- On-board studio quality reverb
SPECIFICATIONS
- Item dimensions: 190mm x 420mm x 185mm (HWD)
- Item weight: 8.7kg
WHAT'S IN THE BOX?
- Slip cover
- Main power supply lead
1 - HI INPUT: ‘Hi’ stands for high gain. This input is designed for the connection of low output level guitars making it well suited for guitars with single coiled or low gain hum bucker type pickups. Use of high gain pickups in this input may drive the preamp too hard causing a “mushy” sound. Only use good quality guitar cable.
2 - LO INPUT: ‘Lo’ stands for low gain. This input is attenuated down approximately 50% from the Hi input and is designed for high output level guitars. It is useful in obtaining output that is “tight” not “mushy” from high gain humbucker type pickups. Also use this input for the cleanest full range sound with extended low end response. Only use good quality guitar cable.
3 - CLEAN VOLUME: Sets how loud the clean channel is. Try cranking it up a little to drive the power tubes harder for that real retro sound and feel that only a quality tube amplifier can deliver. Now use your guitar volume to control the amount of distortion. (Wind it up for distortion back it off a little for clean).
4 - BRIGHT: Adds brightness and life to the treble frequencies of your guitar when on the clean channel. Adds edge and picking emphasis when on the drive channel. The switch has more effect at low Clean Volume/Drive control settings. Use in conjunction with the Treble and Tone controls for optimum performance. Switch up to enable.
5 -
DRIVE: Sets the level of tube preamplifier drive or how dirty your sound is. This control should be used in conjunction with the Drive Volume (6) Setting low levels of gain with high levels of volume will give a clean preamplifier sound with tube output stage overdrive.
Setting a medium drive level and medium Drive Volume will give a nice crisp bluesy lead tone, again with the ability to drive the output stage at higher Drive Volume settings. Setting a high level on the Drive control and a low setting on the Drive Volume will give you a punchy hard rock lead tone, with the ability to again drive the output tubes at higher Drive volume settings. Having set the Drive and Drive Volume controls to your desired sound try backing off your guitar volume and tone controls for lots of other cool sounds. Good tube amplifiers have the unique ability to produce a wide range of sounds by using only your guitar controls, playing weight and style.
6 -
DRIVE VOLUME: Sets how loud the ‘Drive’ channel is. It is useful to experiment with drive levels and drive volumes. If you want a very open, warm and semi overdriven sound try reducing the amount of drive and increasing the drive volume. This reduces pre-amp gain
but pushes the power amp section and makes it work harder giving you a very desirable level of power amp distortion which is a very pleasing “retro” style sound.
7 -
DRIVE SWITCH: Switch up to enable the ‘Drive’ channel. (This switch must be in the down (OFF) position in order for the drive to be switched remotely via a foot switch.)
8 -
DRIVE LED: This LED will illuminate when the Drive channel is activated with the Drive switch (8) or the included Laney FS2-MINI remote footswitch.
9 -
BASS, MIDDLE, TREBLE: These are a traditional set of passive tone controls. Passive controls have the advantage of always sounding musical at any of their settings mainly due to their unique interactive nature. This gives players a more natural set of tools to create
their ideal sound. (Try them all set at midway (5) as a good starting point).
10 - REVERB: Controls how loud the built in reverb sounds.
11 - TONE: The tone control works in a similar fashion to the Tone control you probably have on your guitar except that it uniquely works at the other end of the amplification chain. This has the ability to not only control the overall top end response but also reduce upper end harmonics on the output stage and preamplifier overdrive sounds. This will give you bright cutting sounds at high settings and smooth rounded sounds at lower settings. (Midway (5) is a good starting point).
12 - STANDBY SWITCH: Disconnects the main HT voltage from the tubes but keeps the tubes warm so that they are ready to go instantly. Switch to standby for short breaks when you don’t want to wait for the tubes to warm up again.
13 - POWER LED: This led will be lit when the amplifier is switched on. (Always switch off and disconnect the power cord when not in use).
14- POWER INLET SOCKET: POWER INLET SOCKET: Connect to your power source. Make sure the specified voltage is correct for your country!
15 - POWER FUSE: This drawer contains the main safety fuse for the unit. USE ONLY THE CORRECT SIZE AND RATING OF FUSE AS SPECIFIED ON THE PANEL. If a fuse blows or fails and a replacement of the same size and rating is installed and it in-turn blows, the amplifier has suffered a malfunction internally and needs immediate service from a qualified technician. DO NOT TRY USING A FUSE OF HIGHER RATING. This may cause serious, irreparable damage to the amplifier and presents a serious fire hazard. The mains fuse ratings are detailed in the specification section at the rear of this manual.
16 - POWER: Main power switch for unit.
17 - SERIAL NO: Displays the model and serial number of the unit.
18 - HT FUSE: This fuse protects the DC power to the tubes within the amplifier. USE ONLY THE CORRECT SIZE AND RATING FUSE AS SPECIFIED ON THE PANEL. If the HT fuse blows or fails, and a replacement of the same size and rating is installed and it in turn blows, the amplifier has suffered a malfunction. Firstly check the output tubes and replace faulty ones if required. If the tubes aren’t the cause of the problem, the amplifier should be checked out by a qualified technician. DO NOT TRY USING A FUSE OF HIGHER RATING. Again, this may cause serious, irreparable damage to the amplifier. Fuses are designed to protect, do not take chances.
19 - DI: This connector provides balanced direct feed primarily go to a PA sound desk. It carries an adjacent ground lift switch to remove any hum loop problems. It is sourced from post output section and can be used with or without a speaker load. The socket has a fully bal- anced output, (switchable +4dB/-30dB & Ground Lift) for maximum noise reduction. You may use this socket to record without a loudspeaker connected for silent recording as there is a protective load applied when the speaker socket (25) is not used.
21 - USB: A standard USB 2.0 audio in/out connector is provided for recording purposes. For further explanation of USB and associated controls, see page 9.
22 - PHONES: A stereo jack is provided which can be used for headphones or a stereo feed to a PA system. A Source switch allows you to listen to whatever is on the speaker outputs or the stereo return from the USB. A level control is included for comfortable listening. In ‘amp’ mode, the level arriving at the phones is dependant on the pre-amplifier controls as well as the phones level; make sure you set the pre-amplifier before setting the phones level.
23 - AUXILIARY INPUT: This input allows the connection of backing tracks (or any line level audio signal) to be mixed in post FX loop.
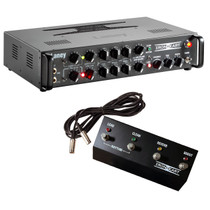
24 - FOOTSWITCH SOCKET: Provided for connection of the included Laney FS2-MINI footswitch. This allows you to remotely switch between the clean/drive channel and switch the built in reverb On/Off.
25 - SPEAKER CONNECTORS: An 8-16 ohm cabinet can be connected directly to these sockets. Please note mismatched impedance will reduce the amplifiers performance and in some cases may cause damage to your amplifier. The 0.5W attenuated socket provides the same sound and feel as the 5W output, but with the maximum output set to around 0.5W.
Unlike many valve amplifiers, the L5-Studio is designed to run either with or without speak- ers connected.
20- EMULATION: This provides continuous 4x12 cabinet emulation to the Phones and switchable emulation for USB and the D.I. output.
26- FX LOOP:
RETURN: A mono jack socket to connect to the output of an external FX unit. This can also be used as a slave in for the power amp. As the FX Loop is an insert type, a connector in the Return socket will mute the pre-amp signal.
ATTENUATION SWITCH: Selects the FX Loop mode of operation:
-10dBu - For connection of FX units with a -10dBu nominal output level. As this is intended for devices with a lower output level, this switch increases the gain of the FX Loop by 10dB.
0dBu - For connection of FX units with a 0dBu nominal output level.
Bypass - Removes the FX Loop from the signal path.
FX SEND: Mono jack socket for connection to the input of an external FX unit.
USB: The USB 2.0 audio I/O connector supporting the following:
1. Ability to simultaneously record the RAW untreated sound to channel 1 (left) and the full amplifier sound to the channel 2 (right).
2. Ability to play back USB stereo information to headphones for monitoring.
Tip: Link from the Headphone output back into the Auxiliary input with a 3.5mm to 6.5mm stereo jack lead allowing simultaneous USB play back.
Tip: This feature will also allow external DSP effects on your DAW to use the RAW signal as a left input then the effected signal sent directly back to the Aux input for mixing with the amp “through” signal all via USB and without affecting your direct sound.
3. Re-Amp Send socket allows for the recorded RAW channel to be sent back to the amplifier input for re-processing via a standard mono instrument jack lead. For the best level match, use the HI input on the amplifier front panel. To fine tune the level, use the Dry Recording Gain control. A good starting position for unity gain is the12 o’clock position. High output pickups or lots of gain produced by FX pedals before the amp may require a slight reduction in level via the Dry Recording Gain Level control to prevent overloading of the input stage in your DAW.
Record out via USB: To run into iPad or iPad mini connect via a Camera USB adaptor, PC/MAC connects via standard A-B USB cable, for use with the likes of Garage Band ®, Audacity ®, MixPad Audio Mixer ®, Pro Tools and similar. It should be noted that the audio output of an iPad or iPad mini is disengaged and returned via the USB. This can be picked up via a rear panel monitor switch on the amplifier headphones in stereo, or if required, routed into a PA system/powered cabinets.
Re-Amp Facility: During recording the amplifier processed signal is sent to the right hand channel. The left hand channel carries the guitar signal totally unprocessed. On an iPad using Garage Band if the track is recorded in stereo then copied with one track panned left and the other track panned right, then both raw and processed signals are available independently.
This allows for the re-amplifying of a sound that may have been over processed initially. To re-amp via Garage Band on the iPad, solo the original channel and record a new one with the link in place from the rear re-amp socket and the guitar input. The newly processed signal will now appear on the right channel with the guitar direct signal again on the left. Other effects may be added into the link cable but the guitar original sound will not be recorded. It will instead record to the left channel the sound directly after the effects with no amplifier and the fully processed signal after the amplifier and effects on the right.
Custom Tab
Returns Policy
You may return most new, unopened items within 30 days of delivery for a full refund. We'll also pay the return shipping costs if the return is a result of our error (you received an incorrect or defective item, etc.).
You should expect to receive your refund within four weeks of giving your package to the return shipper, however, in many cases you will receive a refund more quickly. This time period includes the transit time for us to receive your return from the shipper (5 to 10 business days), the time it takes us to process your return once we receive it (3 to 5 business days), and the time it takes your bank to process our refund request (5 to 10 business days).
If you need to return an item, simply login to your account, view the order using the "Complete Orders" link under the My Account menu and click the Return Item(s) button. We'll notify you via e-mail of your refund once we've received and processed the returned item.
Shipping
We can ship to virtually any address in the world. Note that there are restrictions on some products, and some products cannot be shipped to international destinations.
When you place an order, we will estimate shipping and delivery dates for you based on the availability of your items and the shipping options you choose. Depending on the shipping provider you choose, shipping date estimates may appear on the shipping quotes page.
Please also note that the shipping rates for many items we sell are weight-based. The weight of any such item can be found on its detail page. To reflect the policies of the shipping companies we use, all weights will be rounded up to the next full pound.
 Loading... Please wait...


